If you are using Ghost(Pro), Mailgun is configured by default and works out of the box. On a self-hosted Ghost install—for example on DigitalOcean—you configure Mailgun yourself, which is what this guide walks through. For a wider hosting comparison first, see Ghost hosting options.
Mailgun is an email automation service that offers the possibility to send, receive and track emails effortlessly.
Mailgun Config
- Create a Mailgun account and log in.
- Under the Domains section click
Add New Domain. (Hint: copy the password, you will need it later) - Enter the domain from where you want to send the emails.
- Update your DNS records to verify that you are an authorized for the domain.
- Verify your domain in Mailgun (when DNS changes propagate).
Tip
Mailgun provides different SMTP hosts depending on region. Make sure you pick the correct one (US vs EU) for your account.
Ghost config
Next step is to update the production configuration of the Ghost instance on the server. Open the config.production.json file in your Ghost root directory.
In this file there is a section responsible for mails.
"mail": {
  "transport": "SMTP",
  "options": {
    "service": "Mailgun",
    "host": "smtp.eu.mailgun.org",
    "port": "587",
    "secure": true,
    "auth": {
      "user": "postmaster@your_domain.com",
      "pass": "your_password"
    }
  }
}
service- defines which mail service we use, in this case Mailgunhostandportthese two properties can be found going to Domain Settings then SMTP credentialshost- depends on the region, in our case smtp.eu.mailgun.orgport- Mailgun servers usually listen on several ports (ex. 25, 587, and 465)secure- if want to force a secure SMTP connection
After adding all the settings and saving the config file, restart Ghost:
ghost restart
Test Config
To test the configuration login in to the Ghost Admin Interface
Go to Settings > Email newsletter (or Settings > Membership & newsletter, depending on your Ghost version) and use the Test email configuration option to send a test email.
You can check your email, you should have received the test email.
Mailgun & Ghost Members
If you are using the Members feature, in order to send emails to people who subscribed to your publication, you have to do some additional setup within Ghost Admin:
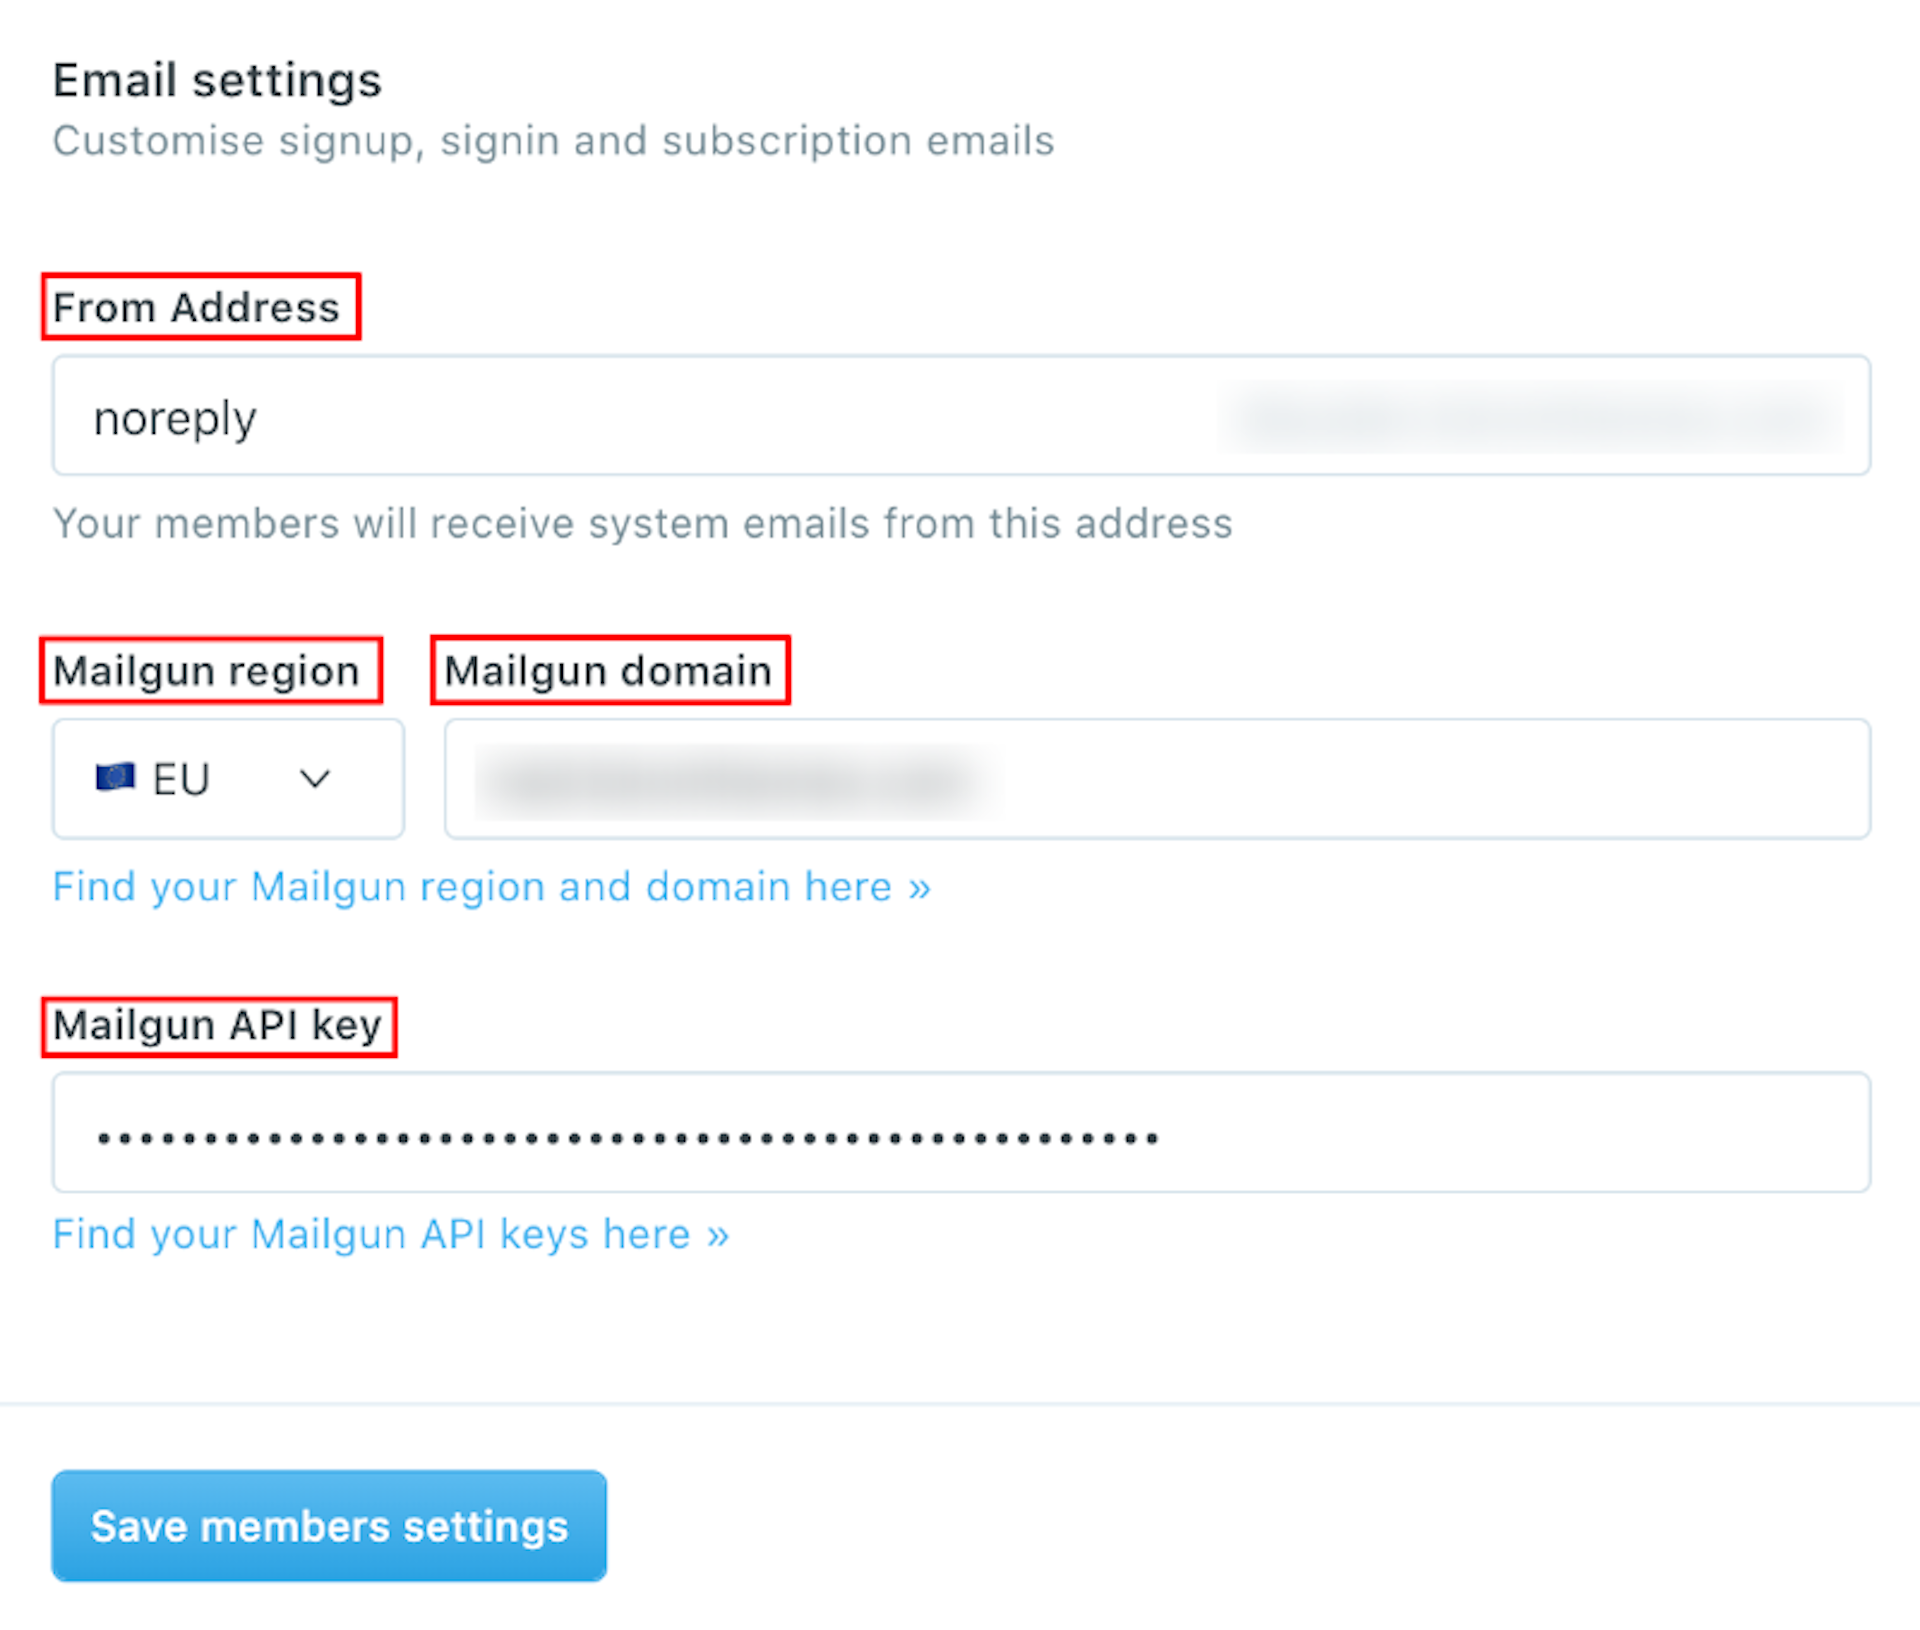
- Go to Settings and open the Email newsletter settings.
- Expand the Mailgun/SMTP configuration section.
- Fill the From Address, members will receive emails from this address
- Fill Mailgun region and Mailgun domain, from your Mailgun account.
- Fill Mailgun API Key
To get the Mailgun API Key, in your Mailgun Dashboard go to Settings then API Keys and copy the Private API Key.
To test this as well, open any post and go to the Post Settings then click Email newsletter. You can set an email where you want to send the test email. Then click Send test email.
That's it, you should have a complete Mailgun Configuration for your self hosted Ghost CMS.